Photo Submission Guidelines
We welcome submissions from our customers for our Projects Gallery and other areas. But before sending us digital photo files, please read and follow these simple guidelines and see the examples at the bottom of the page.
Basic Guidelines (photo examples follow):
- Image Format:
You should use the JPEG format (extension .JPG) for photos. Virtually all digital cameras can save pictures in JPG format with various levels of quality. Lower quality settings greatly shrink the file size and usually don’t affect the quality for webpage display purposes. GIF files are the second preferred format, but are usually much larger. We strongly discourage the use of either bitmap (.BMP) or TIFF (.TIF) image file formats when sending us pictures. They are very large and must be converted to JPGs before posting online.
- Image Quality:
Unless otherwise specified, most user-submitted images on this site are 800×600 pixels in size, with a resolution of 72 dpi (dots per inch). Many cameras have a setting specifically for this. It’s always better to take pictures at a higher resolution/size if possible, since you can shrink an image (size, resolution, or both) with little noticeable loss of quality, but you can’t make it larger without degrading the quality. If you can adjust the JPEG quality, set it for “medium” (roughly 5 on a scale of 10).
- Avoid Digital Zoom:
If you have a physical zoom lens (the lens itself moves to zoom in or out), great. But avoid “digital zoom” features. These just enlarge the apparent size of the pixels to create the impression of zooming in, at the expense of sharpness. Digital zoom is much like sitting two inches away from a TV screen and calling it a bigger television.
- Picture Composition:
More than any other factor, the key to getting a nice picture is to compose it well:- Fill the frame:
Fill the frame with the subject, but leave a little bit of room around the edge. Offsetting the subject slightly left or right from center usually is more pleasing to the eye. If the subject takes up only half the width of the picture, move or zoom in to fill the frame! - Focus and be still:
The most basic rule is often forgotten: the focus must be sharp AND you must hold the camera steady to get a sharp photo! Even slight shaking causes fuzzy photos. The lower the light level and/or the higher the zoom, the harder it is to get a sharp photo. Try to get as close and have as much light as possible. Rest the camera against a solid and steady surface, press the shutter button smoothly and deliberately, and hold your breath while taking the photo. A tripod or monopod is a big help, but any sturdy object can be used to brace the camera. - Context:
Whenever possible, step back and include some of the surrounding area in your detail shots. This helps viewers identify what they’re looking at… otherwise, one fuselage tubing joint often looks just like the others. - Lighting:
Be sure the subject is lit up well from the front side. Bright, diffused light (such as from an overcast sky) is best – direct sunlight produces harsh shadows. Use the flash even in good lighting or when outdoors – it fills in deep shadows for much clearer photos. Avoid bright, back-lit backgrounds… turn the subject around or shield the light. - Avoid busy backgrounds:
Also beware of distracting backgrounds. If possible, ensure that the background isn’t more “busy” than the subject! Often you can move in or zoom so that the subject is sharply focused while the background becomes fuzzy.
- Fill the frame:
- Technical Pictures:
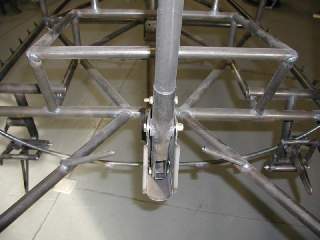
Pictures intended to be less “art” (pictures of your new airplane) and more of a “technical” nature (such as close-ups of a weld joint to show a proper bead line) should focus primarily on showing the subject clearly. Fill the frame with the subject. Use your camera’s Macro mode if it has one. This allows you to get in very close (inches away) to the subject. Sometimes the flash is necessary but overwhelming when the camera is very close to the subject… try moving back a couple of feet and zooming back in on the subject, or soften the flash by taping a piece of white typing paper over it. It is often helpful to shoot the subject area from several angles. Consider placing a ruler, coin, or other familiar object in the picture to provide a sense of scale.
- Digital Cameras:
Using a camera with 3.0 Megapixel (or greater) resolution is ideal, but you can get useful shots with a lower resolution camera if you consider its limitations. The lower the resolution, the smaller the image will have be to remain clear… get in closer and use good lighting. Set your camera for a size of 1024×768 if possible, 800×600 is fine too. The minimum resolution should be 72dpi (that’s the resolution of a typical computer monitor) but more resolution is better. Try to keep each photo’s file size under 100 KB or so.
- Scanners:
If you scan photos, please be sure to send ONE photo per image file, not a single gigantic .BMP file with all the pictures that would fit into the scanner at once. Use the scanner’s preview mode to crop the images before scanning. Set the scanner to save as a JPG file, not as a TIFF or BMP. The same general guidelines apply to scanners as digital cameras… minimum 800×600 pixels with 72 dpi resolution, more is better, and if you can’t get to the minimum, at least get as high as possible.
Some Examples:
 |
 |
|
| This shows what happens when the subject is backlit. Using the flash would have helped. | This image is too dark. A flash would have helped here as well. | |
 |
 |
|
| A good example of the effective use of fill-in flash. Without a flash, the luggage area would have appeared in this photo as a big black hole. Remember, the human eye can see a lot better into such areas than the camera will without the flash on. | Another example of fill-in flash. Though there was plenty of light, this would have appeared very dark without the flash since the metal is very dark in color. Remember, the camera needs all the light possible to take clear photos, especially when photographing dark-colored materials. | |
 |
 |
|
| This photo has a very busy background! It’s very hard to see what the picture is actually of. The airplane should be moved to a clear area, or at least in front of a plain wall, so that it can be seen clearly. | This one is not quite as busy, and it would be difficult to move it much. In a case like this, a flash will often be helpful in order to brighten the foreground and darken the background. | |
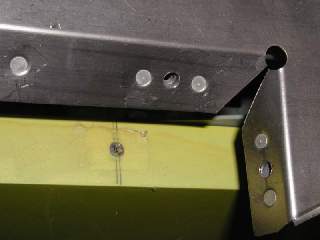
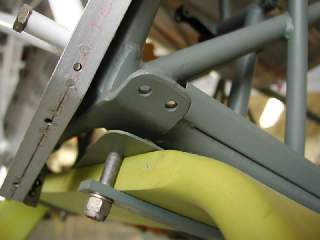
 |
 |
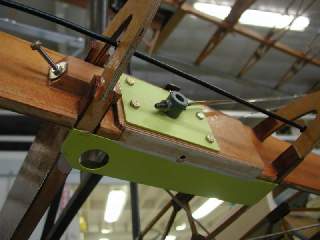
|
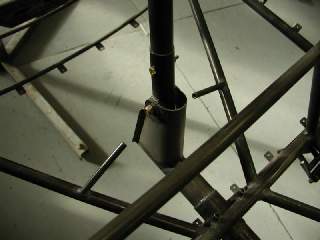
| The picture itself is fine, but where is it? What is it? There is little context to this image. | A slightly wider view gives a better context and helps the viewer understand the position of the oil filter. Often, it’s best to take a wide shot or two to establish context, then more detailed shots to capture fine details. | |
 |
 |
|
| This is the original image. It was shrunken to 220×165 pixels from a sharp 1280×1024 picture. Notice that it is still sharp after the reduction. | When the small picture on the left was enlarged back up to 320×241 pixels, this is the fuzzy result. The moral: you can shrink a big picture, but not expand a small one! | |
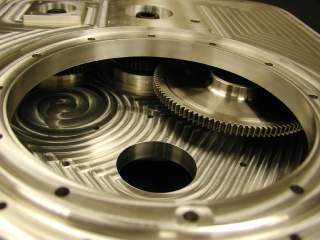
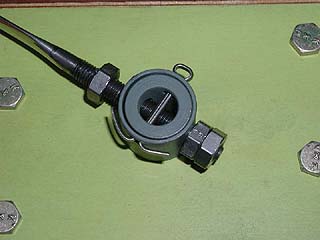 |
 |
|
| A macro lens allows you to move in close and capture tiny details. You can usually leave the macro on even while taking pictures farther away, though this may not be optimal. | Another use of the macro lens in concert with the flash. | |
 |
 |
|
| This is an example of using a macro lens setting to capture details, while also backing away from the subject area a little (about three feet) so that the flash wouldn’t overwhelm and “white out” the picture due to it being too close. After moving away, use the zoom lens to simulate having the camera up close… but the flash will be toned down enough to allow for a better photo. Don’t go too far, though, or you may get out of the range of the macro lens, and the flash may fade away too much to be of use. Another approach is to put a translucent barrier (a sheet of white paper) over the flash to dim it, but allow it to still be used for light while very close to the subject. | Finally, the best way to know how to take good pictures is simple:practice! This was taken with nothing more than a decent-quality digital camera, a $20 living-room spotlight lamp tree, and the willingness to experiment with settings and try some ideas out. When you don’t have to spend money to develop film all the time, you can really get good at digital photography without much outlay of money. Have fun! | |